
Rotations
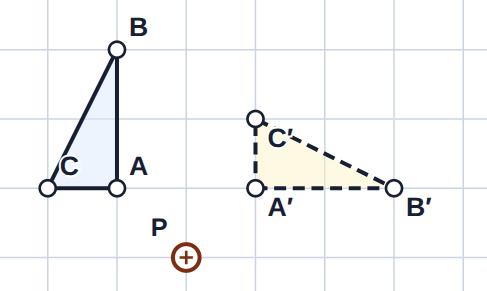
Practise Foundation GCSE rotations on square and coordinate grids. Turn shapes through 90°, 180° and 270°, use the origin and other centres, find a missing centre and describe a rotation fully. Track each vertex to keep the image the same shape and size as the original. Jump to the questions
Practise now
Worksheet preview and key skills
Worksheet preview
Eight questions progress from 90° clockwise and anticlockwise turns on plain grids to rotations on coordinate grids, including 180° about the origin and 270° about another centre.
Place labelled image vertices in six drawing questions. Select a missing centre in Question 6 and write a full rotation description in Question 7. The final drawing has a vertex at the centre of rotation.
What you’ll practise
- Turning each vertex through the given angle and direction about a fixed centre.
- Finding a centre from corresponding points on an object and its image.
- Describing a rotation using its angle, direction when needed, and centre coordinates.
Use the interactive worksheet below, or read the Topic guide for the method and worked example.
Rotations
Place each rotated vertex in the labelled order, then check your answer. For Question 6, select the centre; for Question 7, type a full rotation description.
Topic guide
What is a rotation?
A rotation turns a shape around a fixed point called the centre of rotation. The object and image are congruent: their side lengths and angles stay the same. Each vertex stays the same distance from the centre.
Rotating a shape
Locate the centre, then check the angle and direction. Clockwise follows the hands of a clock; anticlockwise goes the other way. A 90° rotation is a quarter turn, 180° is a half turn and 270° is a three-quarter turn. For 180°, either direction gives the same image. A 270° anticlockwise turn gives the same final position as 90° clockwise, and 270° clockwise gives the same position as 90° anticlockwise.
Turn every vertex about the stated centre. You can trace the shape and the centre, hold the tracing paper at the centre and turn it through the required angle. Use the grid to locate each image vertex exactly, then join the points in the original order. If working by counting squares, count from the centre, not automatically from the origin.
On this worksheet, place A′ to match A, then B′ to match B, and continue in order. Select a vertex button to replace its point or use Clear drawing to start again. For the missing-centre question, select one grid point; selecting another replaces it.
Worked example: 90° clockwise about (1, 1)
A triangle has vertices A(2, 2), B(4, 2) and C(2, 3). Rotate it 90° clockwise about (1, 1).
From the centre, A is 1 square right and 1 up. After a clockwise quarter turn, this becomes 1 right and 1 down, so A′ is (2, 0). B is 3 right and 1 up; its image is 1 right and 3 down from the centre, at B′(2, −2). C is 1 right and 2 up; its image is 2 right and 1 down, at C′(3, 0). Join A′, B′ and C′.
Finding the centre
Match vertices using the side lengths and shape. For a 180° rotation, the centre is the midpoint between any vertex and its image. Check that another corresponding pair has the same midpoint.
For a quarter turn, test a possible grid point as the centre: the lines from it to a vertex and its image must make a right angle, have equal lengths and turn in the given direction. Check the same centre with the other vertices. Tracing paper can also help you locate and check the fixed turning point.
Describing a rotation fully
State the transformation, angle, direction and centre, for example “rotation 90° clockwise about (1, 1)”. For 180°, the direction is unnecessary. “About the origin” means about (0, 0). Follow the requested mapping from shape A onto shape B; reversing the mapping reverses a quarter turn.
A vertex at the centre
The centre does not move. If an original vertex lies exactly there, its image stays at that same point. This is an invariant point. Rotate all the other vertices as usual.
Common mistakes
- Use the stated centre, including when it is away from the origin.
- Check clockwise versus anticlockwise before moving a point.
- Turn each vertex through the full angle; do not slide or reflect the shape.
- Keep each image label paired with its original vertex.
- A correct outline with incorrect vertex labels is not a fully correct labelled drawing.
- When describing a rotation, include the centre and the word “rotation”, as well as the angle and any required direction.